Configure the Microsoft Outlook settings to use e-mail
In this explanation, we explain how to set the (outlook) program to browse the email service provided by us, but if the email service is provided by a third party, please check with the provider to find out how to do this.
To browse the e-mail of your hosted e-mail, and if your e-mail is already created, you must configure the e-mail settings through Outlook for the first time and then you can use the e-mail as usual.
Before you can configure the mail settings, you must decide which protocol to read the mail to use, whether to use POP or IMAP
Set your e-mail account for the first time on Outlook, follow the following:
Run the Outlook program and from the top menu of the program choose(tools) and then account settings (acount settings) as shown in the following image:
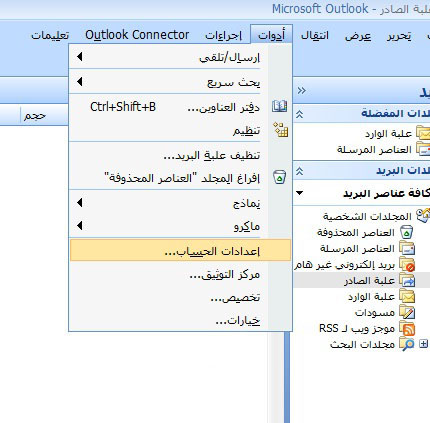
When choosing the account settings, an account settings screen will appear for you through which you can control the accounts that can be managed through the Outlook program,
Since we want to set a new email account, we choose the (email), and then we choose from the tab (new email account) option as shown in the following image:
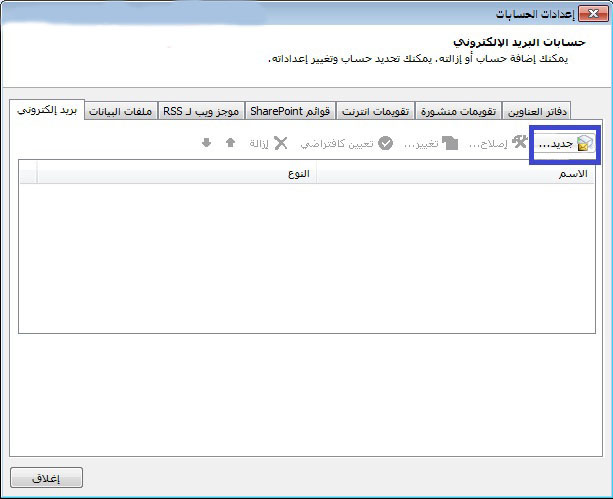
When you click on the Add new mail account, a new screen will appear to us asking for basic information about the mail account as in the following image:
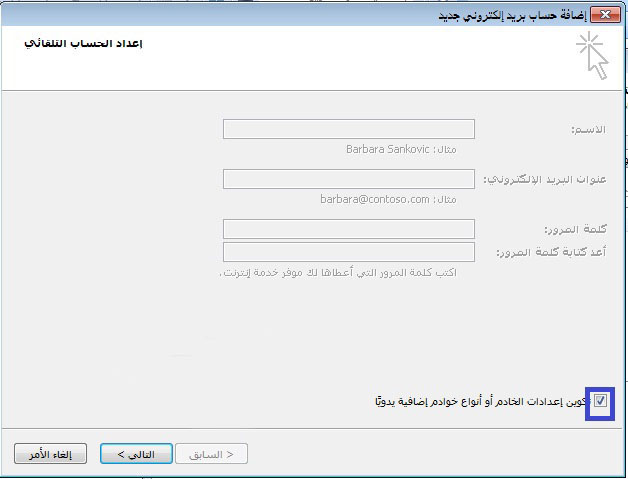
As shown in the picture above, indicate the key
"Configure server settings or additional server types manually"
With the right sign and click on the “Next” key, then the following settings will appear in the window, as in the following image:
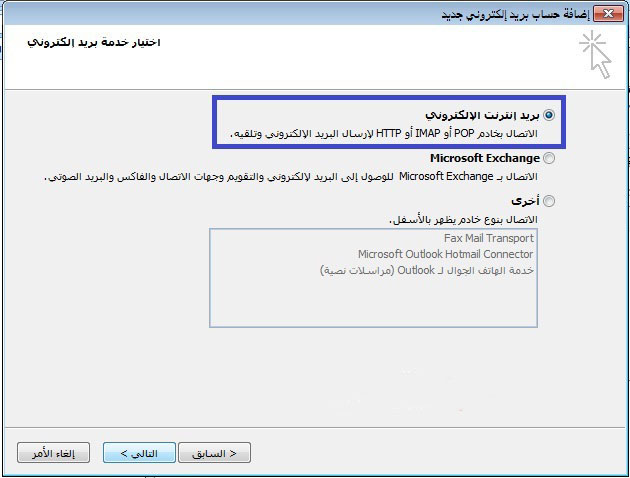
As shown in the image above, click on (internet email) and click on the “Next” key, and then the settings will appear to us in the window as in the following image:
In this screen shown in the image above, we must enter the basic information about our mail and choose the type of mail communication and enter the address of the incoming and outgoing server.
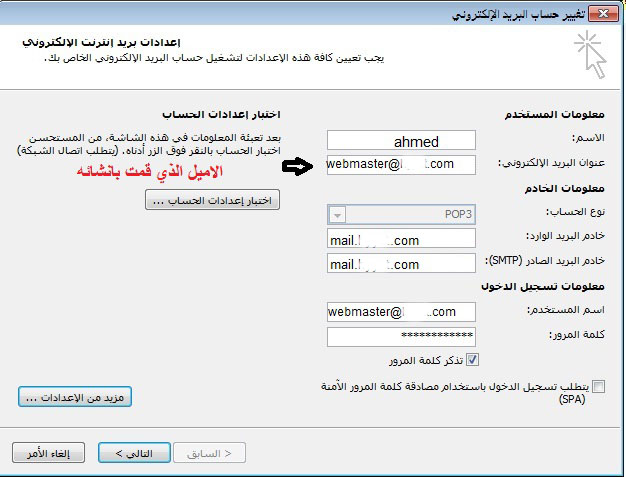
As in the picture, enter your name in the Name field and enter your full email address in the Email Address field. In the account type, choose the type of connection with the mail server, is it a type of POP or IMAP type as you wish.
To find out the difference between them and which one to choose if you have previously decided, click here for more information in the Incoming Mail Server Name and Outgoing Mail Server fields, enter the server name correctly.
For example, if your site’s link is example.com, the incoming mail server and the outgoing mail server are mail.example.com with exmaple.com replaced with your link.
In the login information fields, make sure to enter your full email address as a user name and ensure that you entered the password correctly. For example, if your email is example@example.com, make sure you enter the full example@example.com mail address as a username.
If you use your own device and you trust the security of your device, you can choose "Remember Password" in order to avoid asking for it every time you call your email address.
As for if you are using a public device, we do not recommend that. Also, make sure to remove the checkmark from "Requires logging in using a secure password authentication SPA" since activating this option will not enable you to use your mail for this. Make sure to remove the checkmark from this option as it is Shown in the picture above.
Now we have to make sure of the incoming and outgoing mail servers for this email account, then click on the "More Settings" key as shown in the image above.
Then the advanced settings window for the mail account will appear to us, as in the following image:
في حال كنت قد اخترت البوتوكول POP سوف تظهر الشاشة كما في الصورة التالية:
In case you chose POP, the screen will appear as in the following image:
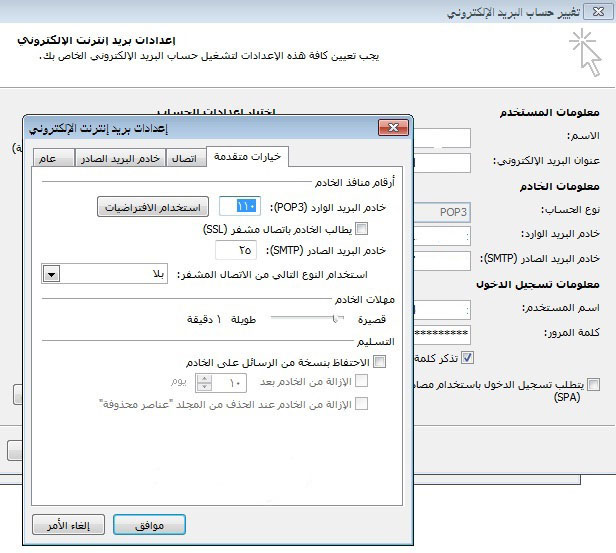
In the case of the POP protocol, you must make sure that the incoming mail server port number is 110 and that the authentication is removed from the incoming mail server, requiring an SSL encrypted connection as shown in the image above.
You must also make sure to choose “(none)” for the option to use the following type of encrypted connection as shown above also. You must make sure that the outgoing mail server is 25.
Then you head to the next step of the explanation.
If you have chosen IMAP, the screen will appear as in the following image:
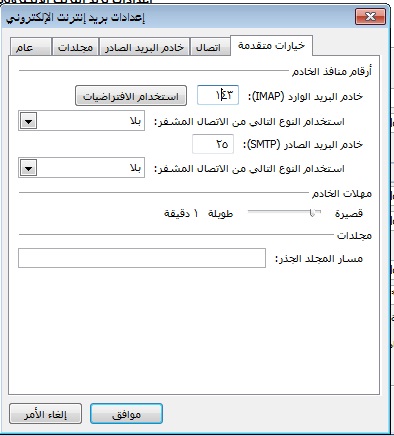
In the case of the IMAP protocol, you must ensure that the incoming mail server port number is 143 and that the validation of the incoming mail server is required. The SSL encrypted connection is required as shown in the image above. You must also make sure to choose “none” for the option to use the following type of Encrypted connection as shown above too. Ensure that the outgoing mail server is 25.
Then go to the next step of the explanation.
After adjusting the settings of the incoming mail server, we must verify the settings of the outgoing mail server by choosing the Outgoing Mail Server tab from the More Settings screen that appears as in the following image when selecting it:
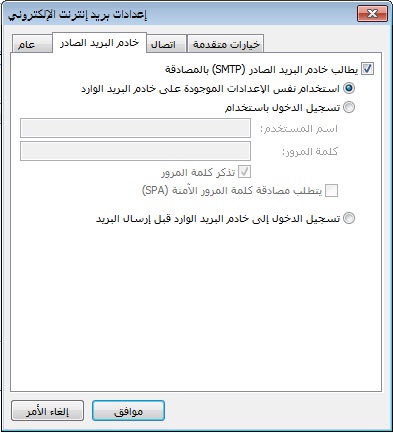
From the outgoing mail server window, we must make sure that the correct sign is marked on “outgoing mail require authentication” as shown in the image above.
And choose the option to use the same settings as the incoming mail server as in the picture above.
For your information, if you do not enable this option, you will not be able to send email messages from Outlook.
And sometimes also in the case of failure to send messages despite your choice of this matter you must choose “login using” instead of "the outgoing mail server requires authentication” and then enter your mail account information
It is the complete email and password. After we make sure that we fill out the information correctly, we click on the approval key
Then click on the “Next” continue key in the Add Email Account window
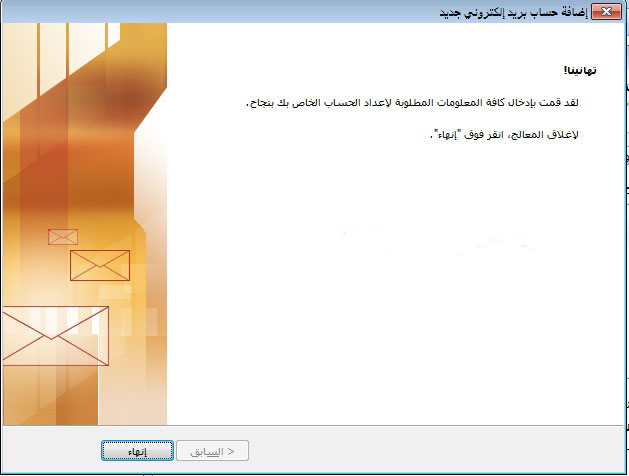
Then a window appears showing us that the process is successful and similar to the following image:
Thus, we have successfully set the email to Outlook.
You can send and receive messages successfully, and in case of failure to receive or send messages, please make sure of the proper settings.
Note:
If the pictures shown in the explanation differ from what you have:
This may be due to the difference in version between the outlook that the explanation was executed with and the outlook release on your device.
In this case, we recommend that you review the email settings page for use with desktop programs and try to apply the basic settings contained in it to the program you are using.
Always if you receive a warning about using your site’s security certificate, agree to use the certificate to continue.
As you might see a message stating that the server's identity could not be verified or the server's security certificate could not be authenticated, then you must continue to continue.

